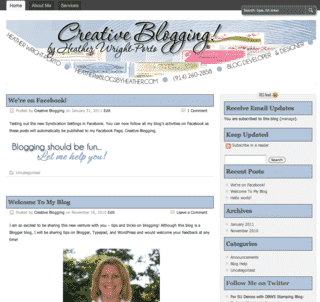
After writing the recent article on how to do this in TypePad, I was asked how to do this in WordPress. I do have a WordPress.com test blog that I used while writing my 2nd book, Creative Blogging, where there is an entire chapter in customizing CSS code in Blogger, TypePad and WordPress.com.
Last night I played around with the CSS code in the zBench template (code may differ depending on the template chosen) I used in WordPress.com. I can't say how to do it in a privately hosted WordPress blog.
However, you have to pay for the Custom Design Upgrade $30.00 (which used to be a CSS Upgrade for approx. $15). The new Custom Design Upgrade includes TypeKit in customizing your WordPress blog fonts!!!
Back the automatic signature in WordPress:
- From the Dashboard, go to Upgrades on the left sidebar, and then you will see Custom Design.
- Click the Buy Now to purchase the $30.00 Upgrade which will allow you to customize your fonts and CSS code.
- Then go to the Appearance area from the Dashboard and click Custom Design.
- Then the CSS tab.
- The CSS Stylesheet Editor will appear.
Here is the code I used to insert the auto signature you see here in my test blog (the signature is "Blogging should be fun, let me help you!" image:
.post-meta {background:url('http://heatherporto.typepad.com/.a/6a00e553a87d5588330154327c2582970c-320wi');background-repeat:no-repeat;padding:90px 200px 0 0;}

You will need to replace the URL path as well as possibly adjust the 90px and 200px depending on the height and width of your signature image.
Even without purchasing the Upgrade you can preview the changes by clicking the Preview button.
Happy Blogging!!!
Heather Wright-Porto
www.BlogsByHeather.com
