Unlike Blogger and WordPress, it has always been more difficult in TypePad to customize your blog design unless using Advanced Templages (which is NOT advisable for those not comfortable with coding!). Yes, their CSS module is a nice feature, however, still no where near the flexibility and customization available in Blogger and WordPress.
In Blogger and WordPress, you can quickly access the site's main templates (CSS and HTML) and make your changes.
- In Blogger, go to Template from your Dashboard and click Edit HTML and you have immediate access to CSS and HTML code. You may also instead click Customize to use the built-in Template Designer.
- In WordPress, from the left side Dashboard, you can click on Editor, normally under Appearance. This again gives you direct access to your Style Sheets and other areas such as Main, Footer, Header templates.
Of course, you need CSS and HTML knowledge to start working with code yourself. I would suggest going to W3Schools.com as they have great tutorials and FREE!
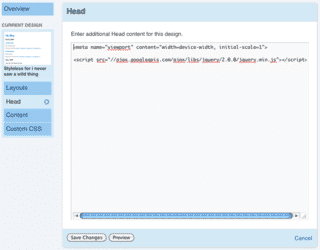
The Head Module
However, TypePad is making it a little easier now by adding a Head Module. It is only in BETA and NOT available for everyone yet!
This specifically helps when you find tutorials that say "add ***this code**** before the </head> closing Head tag", things like installing Sliders (like the new Wow Slider) and other cool tools and gadgets.
However, it is only available for those with the Unlimited package ($14.95) or higher. And again, it is only in Beta and not available to everyone yet!

So TypePad continues to make progress, but still no direct access to the site's main templates unless you redesign your blog using Advanced Templates, whch again I would not advise in most cases. TypePad does have a Theme Builder though – a visual interface in helping you customize your site's appearance. That, with the added CSS and HEAD modules, some customization can be done without having to switch to Advanced Templates, and is suitable for most bloggers!
